No products in the cart.
Return To Shop
0
£0.00
0
No products in the cart.
Return To Shop
Shopping cart (0)
Subtotal: £0.00
Free shipping over 49$
0
£0.00
0
No products in the cart.
Return To Shop
Shopping cart (0)
Subtotal: £0.00
Free shipping over 49$
FREE SHIPPING+30 DAY RETURNS
Order Now - 3 Buyers Get 100% Order Value Back Daily
0
£0.00
0
No products in the cart.
Return To Shop
Shopping cart (0)
Subtotal: £0.00
Free shipping over 49$
When embarking on a hiking adventure or a multi-day backpacking trip, a well-packed rucksack is your most important ally. From carrying essential gear to ensuring comfort and balance on the trail, packing your bag efficiently can make or break your experience. One critical piece of gear that every hiker relies on is their sleeping bag. However, due to its size and bulkiness, packing a sleeping bag can often be a tricky task. Finding the right way to attach it to your rucksack is key to keeping your load secure, well-balanced, and accessible, all without compromising your comfort or stability on the trail.
Whether you’re a seasoned trekker or a beginner heading out on your first trip, knowing how to properly attach your sleeping bag can save time and hassle. In this guide, we’ll walk you through the process from start to finish, including preparation steps, detailed instructions, alternative methods for different types of backpacks, and extra tips to make your trek more enjoyable. With the right approach, you’ll be ready to hit the trail with confidence and ease, knowing your gear is securely packed and ready for the adventure ahead.
Why Properly Attaching a Sleeping Bag Matters
Your sleeping bag is essential for staying warm and comfortable during overnight trips, but it’s also one of the bulkiest items you’ll carry. Simply cramming it into your bag isn’t ideal, as it’ll take up space you need for food, clothes, and other essentials. Attaching it to the outside of the rucksack solves this issue, but doing so incorrectly can lead to imbalance, discomfort, or even a soggy sleeping bag in bad weather.
When done right, attaching your sleeping bag keeps your pack organized, distributes weight evenly, and ensures you’re ready for whatever the trail has in store.
Preparation Before You Start
Before you jump into attaching your sleeping bag to your rucksack, gather the necessary equipment and make sure everything is ready:
What You’ll Need
- Your rucksack: A sturdy rucksack with gear loops, straps, or compression options is ideal for external attachments.
- Sleeping bag: Opt for a lightweight, compressible sleeping bag if possible.
- Compression sack (optional, but highly recommended): This reduces the size of your sleeping bag, making it easier to attach securely.
- Straps or bungee cords (if not built into your rucksack): These will be used to fasten the bag to your rucksack.
Quick Check
- Waterproof your sleeping bag. Use a plastic bag or dry sack to ensure it stays dry and functional even in wet weather conditions. This is critical, as nothing is worse than unrolling a soaked sleeping bag at the end of a long day.
Once your gear is ready, you’re set to attach your sleeping bag.
Step-by-Step Instructions to Attach Your Sleeping Bag
Follow these steps to securely attach your sleeping bag to your rucksack:
Step 1. Locate Attachment Points on Your Rucksack
Most rucksacks have gear loops or compression straps on the bottom, sides, or back. These are typically the best places to attach a sleeping bag. If your rucksack doesn’t have these features, you’ll need external straps or bungee cords.
Step 2. Use a Compression Sack
Place your sleeping bag into a compression sack and tighten the straps to reduce its size as much as possible. This not only makes it more manageable but also minimizes its impact on your overall rucksack balance.
Step 3. Position the Sleeping Bag
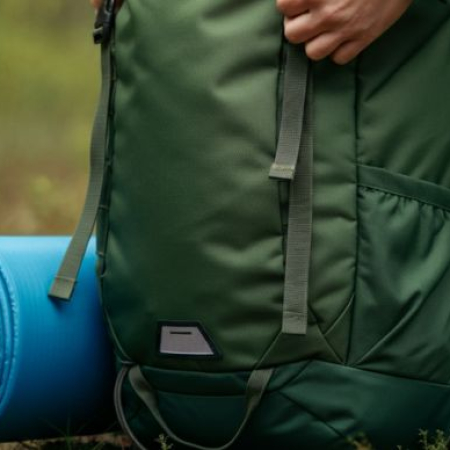
For most rucksacks, the bottom is the best location to attach your sleeping bag for optimal weight distribution. Place the compressed sleeping bag horizontally against the bottom of the rucksack.
Step 4. Secure the Bag with Straps
Using the rucksack’s built-in straps or external straps, loop and fasten the sleeping bag tightly. Ensure there’s no slack to prevent it from swinging or coming loose during your hike.
Step 5. Double-Check the Fit
Give the bag a gentle shake or tug to confirm it’s securely attached. Adjust the straps to tighten any loose ends and prevent movement.
Bonus Tip for Side Attachments
If you prefer attaching your sleeping bag to the sides of the rucksack, follow the same process but ensure it’s evenly balanced to avoid lopsided weight distribution.
Alternative Methods for Different Rucksack Designs
Not all rucksacks are created equal, and your approach may vary depending on your gear. Here are some alternative attachment methods:
Option 1. Top-Mounting
Certain rucksacks allow sleeping bags to be placed under the top lid. Simply tuck the sleeping bag inside the lid compartment and tighten the straps. This method is great for keeping your sleeping bag protected from dirt and moisture.
Option 2. Side Straps
If your rucksack has side compression straps, you can attach the sleeping bag vertically on one or both sides. This is ideal for smaller sleeping bags but requires careful balancing to prevent tilting.
Option 3. Daisy Chains and Gear Loops
Many hiking packs feature daisy chains or gear loops designed for attaching bulky items. Use carabiners or bungee cords to secure your sleeping bag to these loops.
Each method has its pros and cons, so choose the one that best suits your rucksack design and personal preference.
Tips and Tricks for a Smooth Journey
Properly attaching your sleeping bag is one thing, but these additional tips will ensure everything runs even more smoothly:
Distribute Weight Wisely
Sleeping bags are lightweight but can be bulky. Ensure that heavier items are packed closer to your back and lower in the rucksack to maintain balance.
Weather Protection
Always use a waterproof sack or cover for your sleeping bag. Sudden rain can be unpredictable, and a dry sleeping bag is crucial for a comfortable night.
Quick-Release Knots
If you’re using bungee cords, secure the bag with quick-release knots for easy access during setup or teardown.
Avoid Dragging
Make sure the attached sleeping bag sits high enough off the ground to avoid scraping on rocks and dirt as you walk.
Regularly Check Straps
Occasionally, stop during your trek to ensure the sleeping bag is still tightly secured. Loose straps can cause sway, imbalance, or even loss of your bag.
By incorporating these tips, you’ll ensure a hassle-free hiking experience.
Take the Next Step for a Stress-Free Adventure
Attaching a sleeping bag to a rucksack is a small but vital part of preparing for any outdoor adventure. With the methods outlined in this guide, you’ll stay organized, balanced, and ready for anything the trail throws your way.
Now that you know how to pack like a pro, it’s time to hit the trails with confidence. Remember, preparation is key to a successful hike.
Happy trekking!
Conclusion:
Hiking is an enriching experience that allows you to reconnect with nature, challenge yourself physically and mentally, and create lasting memories. By following the tips in this guide, you can ensure a stress-free and enjoyable hiking adventure. Remember to pack light but efficiently, know your limits, stay hydrated and fueled, be prepared for any weather conditions, and always prioritize safety. So grab your gear, head out into the great outdoors, and embrace the beauty of the world around you through hiking! Keep exploring and never stop learning – there’s always more to discover on the trails.
john
I’m John, co-founder of Levant Leather and a passionate expert in premium leather. With nearly a decade in the luxury leather industry, I’ve gained deep experience as both a designer and manufacturer through my work at Levant Leather
Author Posts 


